Flashing Around A Cupola On Metal Roof

Pin On Metal Roofs Being Installed

Standing Seam Painted Steel Roof Wider View Of Chimney And Window Pan Metal Roofing Prices Metal Shake Roof Steel Roofing

Head Wall Transition Flashing For Roofing Copper Aluminum

Pin On Roofing

Pin On Cupolas Finials Weathervanes

Pin On Cupolas

Also apply a bead of caulk to the top edge of the cupola base before attaching the mid section.
Flashing around a cupola on metal roof. The width of the flashing you need depends on the pitch of your roof. When mounting for ventilation or accessibility you will want to apply roofing sealant flashing to seal the sides of the cupola base to the roof. Setting our cupola and finishing trim on our metal roof on our farm house build. Even if the leak is along one of them keep checking along the way as it could be multiple points.
Wind rated octagon and copper cupola mounting option. Standard up to 6 12 roof pitch or extended higher than 6 12 roof pitch. The steeper your roof the longer the sides of the saddle fig. There was rotten plywood all around it.
This cupola was a funnel for water to get in until we got ahold of it. The flashing is pre cut to a 4 12 pitch. Most professional roofers can easily install a flashing membrane on the flat open space of a metal roof and then secure it. A decorative cupola differs from a functional cupola in that the roofing material and roof sheathing does not need to be cut away to create a vent hole.
Self tapping sheet metal screws 1 in. The decorative cupola in this installation was built by a company called walpole woodworkers. 2 assemble the end pieces as shown with sheet metal screws. 1 attach the cupola to the flashing assembly with sheet metal screws.
It is constructed of wood with metal flashings over the top to complete the cupola look. We are so blessed by our neighbor who handcrafted and gifted the cupola to u. Wind rated octagon and copper cupolas come standard with a pre assembled base mount. 3 attach the unit to the roof.
Website designed at homestead build a website for your business. These types of cupolas should be installed with step flashing to prevent leaks. Roofing nails construction adhesive acrylic caulk roof cement two tubes. Galvanized screws 1 1 4 2 and 3 in 1 2 in.
To prevent this water penetration flashing forms the intersections and terminations of roofing systems and surfaces. Leave an area in the 2 lower sides unsealed to allow any water to drain. Then each side of the cupola individually letting the water run down from the cupola roof. It is availble in two options.
2 if a weather vane is being used attach the shaft to the roof cap coupler. Next do the flashing on the ridge cap sides. But roof lines and profiles are getting more creative and complex.

Skylights In Metal Roof Fibreglass Roof Metal Roof Aluminum Roof

Pin En Proyectos Que Debo Intentar

Pin On Metal Roof

Pin On 9879 Amberley Drive

Pin En Metal Roofing Flashing

Disadvantages Of Asphalt Roofing Classic Metal Roofs Llc Metal Roof Cheap Roofing Roofing

10 Roof Problems And What To Do About Them Roof Problems Home Repairs Roofing

How To Build A Cupola Building A Garage Cupolas Diy Pole Barn

Pin On Roofing Tips And Ideas

Pin On Ewa Yea

Pin On Door Awning

Pin On Dormers

Flickriver Most Interesting Photos Tagged With Eyebrowdormer Metal Roofs Farmhouse Farmhouse Exterior Front Porch Addition

Copper Cupola Roof Copper Work Geodesic Dome Chimney Cap

Pin On Copper Jobs

How To Install A Cupola And Weathervane Shed Building Plans Shed Shed Plans

Pin On Copper Roofs
Raleigh Roofing And Restoration Custom Copper Copper Roof Aluminum Roof Copper In Architecture
1

Pin On Konstru

Pin On Chimney Kits

Pin On Roof

Metal Roof Valley Glass Roof Roof Design Roof Architecture

Pin On Roofs Roofing

How To Install A Decorative Cupola Barn Cupola House Exterior Cupolas

Installing Metal Roofing Over Shingles Metal Roof Installation Metal Roof Panels Roof Panels

Copper Turret Roof With Custom Diamond Shaped Copper Roof Tile And A Copper Finial Roof Cap Closeup Picture Copper Roof Zinc Roof Roof Cap

Pin On House Repairs

Beauty Shedplans Copper Roof House Garage Guest House House Exterior

Ideas Metal Roof Purlins Over Shingles Metal Roof Purlins Over Shingles Metal Roof Purlins Koukuujinja 2448 Diy Metal Roof Metal Roof Over Shingles Metal Roof

Cupola Installation Guides Roof Pitch Guide Cupolasdirect Cupolas Installation Pitched Roof

Pin On Diy

2020 Metal Roofing Prices Per Sq Ft Total Cost Installed Vs Shingles With Images Metal Roof Cost Standing Seam Metal Roof Roof Cost

Assembly Of 36 Model 360 Cupola For Post Frame Buildings Post Frame Building Cupolas Shed Design

Pin On Copper Flashing
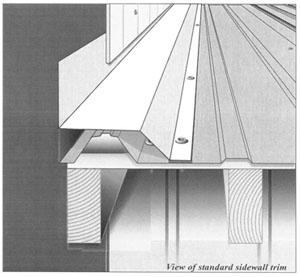
Sidewall Flashing Allsteel Inc Gepp Harrison Arkansas

Metal Roofing Snow Guards Metal Roofs Vermont Copper Roof Metal Shingles Metal Roof

Fabricated And Installed By Coppersmithkane For The City Of Omaha 14 Foot Cupola On Park Pavilion Brown Park Park Pavilion Outdoor Decor Outdoor Structures

Cupola Installation Instructions How To Install Cupola Cupolas Ridge Vent Installation

Put Metal Roof Mobile Home Wood Burning Fireplace Inserts Stone Chimney Fireplace Inserts

Cow Cupola Barn Cupola Cupolas Pergola Lighting

Buckskin Metal Fascia Roof Fascia Soffit Pinterest Metal Roofing Prices Metal Roof House Exterior

